Things to Know Before Buying Lighting Kits

Studio lighting was not my enthusiasm till just recently. As a matter of fact I’m not professional digital photographer at all as well as I have totally various job. When my first child was born I made a decision to spend some cash as well as buy a great SLR video camera and I acquired a Nikon D80. Nevertheless, quickly I realized that the camera does not magically make extremely quality images and I really did not truly like all my images as well as particularly the ones taken at home. This was because of the bad lighting certainly.

studio lighting kits

Source: https://www.backdropsource.com/

After long excavating in internet I made a decision to invest a little money into a studio lighting set. I have to admit that this is just one of my best purchases I have ever before made. What I actually like is that with my studio set I have control over the environment and also I attain suitable results. At first I didn’t adhere to any type of guidelines as well as simply pointed my strobes at my topic without thinking excessive. Nevertheless, I have to confess that these are the photos I like one of the most (might be since they were my first ones with studio strobes).

Later I began to learn more and also even more as well as I attempted some various studio lighting techniques like Rembrandt Lighting, Butterfly Lighting as well as Hatchet Lighting. These are really straightforward portrait photography techniques but you obtain really good pictures. Naturally sometimes you need greater than merely one strobe. In most instances, in addition to your primary light, you will certainly need light for the background and another one for “hair” light (to accomplish this nice splitting up from the background). This is where you realize that a green screen photography set is an excellent investment – sometimes buying all parts separately can triple the price than getting them as a set! Nearly all kits have 2 or 3 flash strobes and also means them, softboxes, umbrellas as well as barn door with honeycomb grids and shade gels. Also though it’s not compulsory, many studio kits come with cordless trigger (transmitter as well as receiver), and sync cable. Some kits may include backgrounds as well as represents them. Likewise, all lighting kits come with an excellent bag which makes them far more mobile.

About Lighting Kits

From all parts the most important ones are certainly the flash strobes. A great strobe is not necessarily with much power – I ‘d say that for home studio you just need 250 w/s. Nevertheless, the power defines the reusing time (the moment needed for the strobe to charge). At max power it takes even more time. My strobes are 300 w/s and their recycling time at complete power has to do with 2.5 – 3 seconds. This is good sufficient for residence studio I assume, despite the fact that occasionally I miss out on “the shot”.

Lighting Techniques of Green Screen Photography

Green Screen Digital photography is mostly concerning a method where the background image of a photo/video is changed by an additional picture digitally. The strategy is called so, since the green color is normally made use of as a backdrop. The main reason for utilizing green background is that digital cams have picture sensors that are much more breakable to green shade than other ones. It is an innovative strategy for developing remarkable and desirable images. It is extensively used in activity, scary and science-fiction flicks that need various effects to provide an impression of taking us to the time and also area where the tale works.

Lighting Techniques of Green Screen Photography

Now-a-days, you can get several image or video-editing software application devices meant for making exceptional photos. Some tools might likewise provide a number of green screen background photos. The digital photographer could substitute green/ blue background holding various other background pictures utilizing these tools. Green screen strategy is truly for the electronic camera men, due to the fact that they require not bother about the background. The display is itself a background as well as camera men could have fun with any type of layouts and also shades on the screen. Excellent flexibility is readily available holding the camera men or photographers to reveal their creativeness in generating desirable backgrounds.

Function of Light in Green Display Digital photography

A professional photographer could have fun with shadow and light to create eye-catching pictures or images. There are different kinds of illumination impacts that could be applied by him. Let us go over those effects:

Back Lighting

Lighting Techniques of Green Screen Photography studio

This illumination is utilized for lighting kits up the topic’s background. It lowers the shadow and also averts shadow areas from falling on the topic for portrait photo lighting.

Side Lights

In this kind of illumination result, the side section of a person is illuminated to avert the shadows. A digital photographer should ensure that no shadow fall on the side region of that person.

Soft Result

This result could be used by diffusing the light. It is done during modeling sessions, when there is a have to show a soft photo of the version.

Since green display digital photography has several advantages as well as usages, it is well approved by professional digital photographers and movie manufacturers. The technique is applied in still digital photography & portrait photography also. It can be made use of in lecture area distribution of technical details; while digital photography hobbyists could utilize it for explore their imagination.

There are some hefty elements that need to be taken care in environment-friendly screen strategy, and the most vital are quality video cameras as well as precise lights.

Lighting for Portrait Photography

Light is the raw product of a professional photographer. High as the painter works with paint as well as the artist works with rock, the professional photographer deals with light. This analogy is not precise nonetheless, due to the fact that as the painter as well as sculptor deal with real material compounds, the photographer works with a form of power. Comprehending the behavior of this type of energy that we call light, is foundational to your success as a picture photographer. A painter could not have to understand the chemical and also physical residential properties of each component of her paints, however she has to completely recognize ways to mix the various colors, and just how the paints act as she uses them to the canvas. Equally as a painter or sculptor must obtain masterful understanding into the behavior of the raw materials of their fine arts, so have to the picture digital photographer get an eager understanding of the habits of light.

Lighting for Portrait Photography

The very first prerequisite for digital photography is light being sent out from a source. Just think of it, without light photography is difficult. Light may be released from an organic source, such as the sun, or from a fabricated resource, such as strobes or constant source of lights. In 1931, the strobe was created for use in still photography by Harold Edgerton , an electrical developer from MIT. Today, the strobe is by far the most pre-owned light source in the portrait studio. Benefits of strobe lights for picture studio photography consist of: sensibly precise control of light strength and also light shade temperature, reduced heat generation as compared to a consistent light source, and reduced power consumption for the quantity of light result.

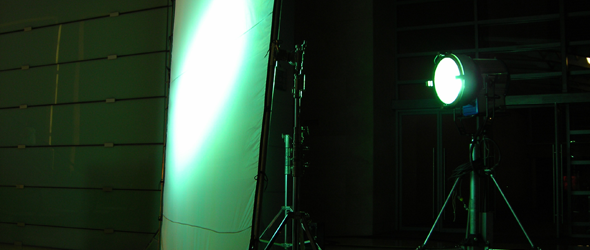
One of the most important property of light to the portrait professional photographer is the light’s intensity or illumination. There are numerous methods of managing the strength of light striking the subject. In the studio, the electrical power supply of contemporary strobes could be adjusted. The strobes might be placed farther away from the topic. Outdoors, you could make use of cloud cover or the overhang of a tree or building, or perhaps the moment of day, to manage the strength of the event light on the topic. These methods work for managing the standard (total) light strength of the make-up. Lots of devices have actually been established to manage the relative strengths of light (specular highlights) of certain areas within a structure. Tools such as scrims, gobos, snoots, grid spots, and also barn doors, are frequently used to partly block, direct, or otherwise manage the loved one light strengths within a composition.

Lighting for Portrait Photography studio

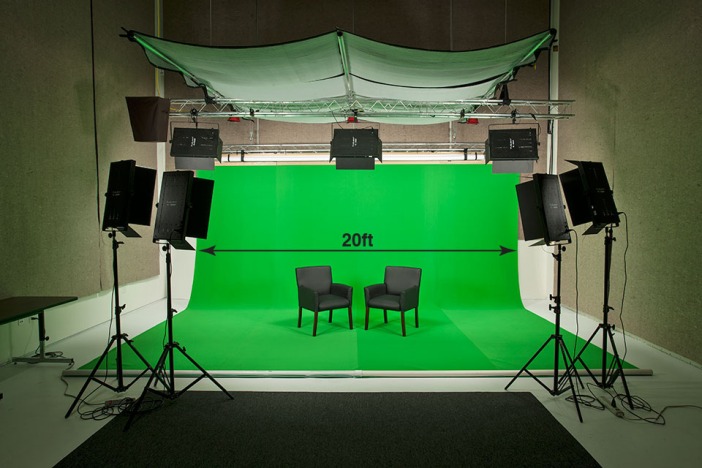
Another home of light of terrific relevance to the picture photographer is the light’s shade temperature level. Pure white light is the result of a similarly well balanced blend of the 3 primary colors: red, green, as well as blue. In various lights problems (e.g. cloudy versus complete sunlight), the proportions of the color combination could vary. Normally, the human brain automatically makes up for this, as well as you do not notice the difference as you leave one lights condition and also enter an additional. Movie can not make this exact same automatic settlement. For that reason, distinctions in color temperature like green screen photography need to be manually adjusted for by the photographer. Shade temperature of various light problems is commonly specified in levels Kelvin. There are three common color temperature level ranked films frequently made use of by professional photographers. “Daytime” movie is designed to be revealed by 5500K light, and “indoor” movie is developed to be revealed by 3400K light, or 3200K light for professional “indoor” film. For a greater level of control over the white balance when making use of film, shade adjustment filters are used. Many if not all digital SLR cams have a white equilibrium modification to electronically make up for transforming color temperature levels experienced in numerous light conditions. In digital photography, when shooting in RAW layout, the shade temperature level can effortlessly be fixed in Photoshop.

A third home of lighting kits that is crucial to the picture photographer is contrast. A light has high contrast if its rays all strike the subject at around the very same angle. A light that is diffuse has reduced contrast, since its rays strike the subject from various angles. High contrast light sources create shadows with a tough edge, while reduced contrast source of lights produce shadows with a soft side. This is because with a high comparison light, where the rays all come close to the subject from approximately the exact same angle, no light gets in the edge of the shadow and also the shadow’s edge continues to be distinct. A source of light’s family member contrast is normally figured out by the dimension of the source of light and its range from the topic. The sunlight on a clear day is fairly small in our sky, as well as a result it is a high comparison source of light producing hard bordered shadows. On a gloomy day, the light from the very same sunlight is expanded as well as diffuse. Successfully the entire sky ends up being a reduced comparison light, creating very soft bordered shadows. In the studio, we have many light modifiers readily available to us, to regulate the reliable size of the light and also thus control the degree of comparison. For any kind of offered dimension of a source of light, as it is located farther and also farther away from the topic we see that it effectively lessens as well as smaller sized, generating greater as well as higher levels of contrast, albeit reduced as well as lower strength.